





Six convincing materials, built from mathematics instead of scans.
Many realistic materials are built from data captured from the real world: photogrammetry scans of actual surfaces, processed into texture maps for color, roughness and height. I wanted to know whether it was possible to build realistic materials from mathematics alone, layering effects like bump and normal maps so a simple mesh reads as a complex surface.
None of the six materials use any image data. Every surface is generated from code, pixel by pixel, which is why the same material wraps a sphere, a cube or a torus knot without a seam.
Most of the surfaces start as noise and a field of scattered dots.
The dots make a cellular pattern.1 They're scattered at random through space, one inside each cube of an invisible 3D grid. The grid only keeps the dots evenly spread and makes the nearest one quick to find; it never shows up in the result. Every spot on the surface belongs to whichever dot is nearest, which splits the surface into irregular cells, one per dot, with a border wherever two dots are equally close. The pattern's value is the distance to that nearest dot: zero on the dot, growing towards the cell's border.
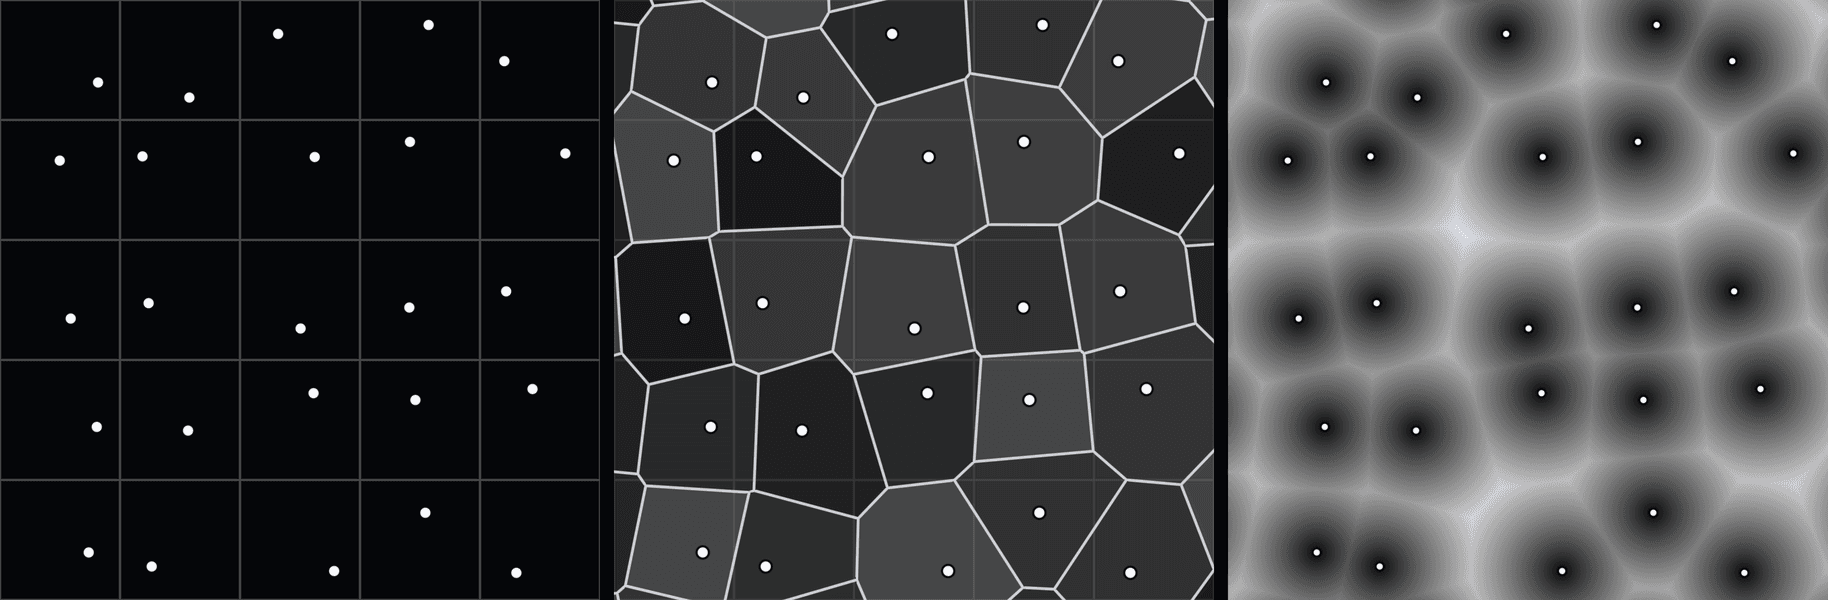
These patterns get used in three ways: as the height of the surface (which sets the bumps and how light catches them), to blend between colors, and to decide where effects like a glow appear. Each material combines them differently:
- Hammered gold: the distance to the nearest dot becomes the depth of a dent, so each dot is one hammer strike, deepest at its centre and rising to a ridge where two dents meet.
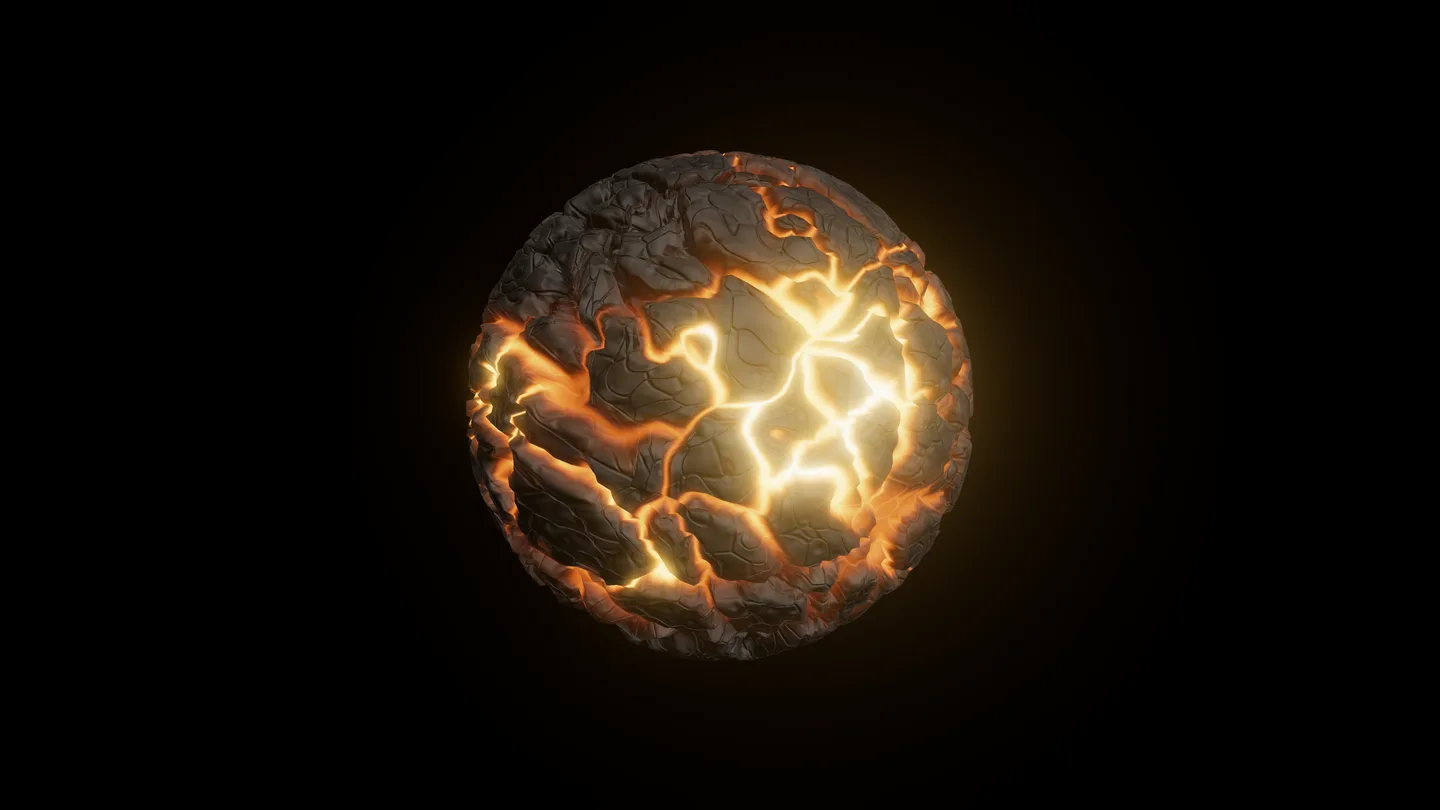
- Lava rock: the gap between the nearest and second-nearest dot drops to zero exactly on the border between two cells. Those borders become glowing cracks, and the cells between them become plates of cooled rock.
- Veined marble: noise bends a set of straight stripes into wandering veins, and a second layer of noise adds cloudy light and dark patches to the stone.
- Pearlescent: noise folded back on itself makes irregular growth rings, and the rings set the thickness of a thin film whose color shifts as the viewing angle changes.
- Carbon fibre: no randomness at all, just a repeating weave built from waves.
- Glass: a faint layer of noise frosts the surface. Most of the look comes from bending light through the body instead.
This is the cellular pattern the gold and lava are built on:
float worley(vec3 p) { // p: a position in 3D vec3 i = floor(p); // which cube it's in vec3 f = fract(p); // where inside that cube float d = 1.5; // nearest distance found so far // Check this cube and the 26 around it (3 x 3 x 3) for (int x = -1; x <= 1; x++) { for (int y = -1; y <= 1; y++) { for (int z = -1; z <= 1; z++) { vec3 g = vec3(float(x), float(y), float(z)); // hash33 gives each cube its random dot position d = min(d, length(g + hash33(i + g) - f)); } } } return d;}From bump mapping to displacement mapping
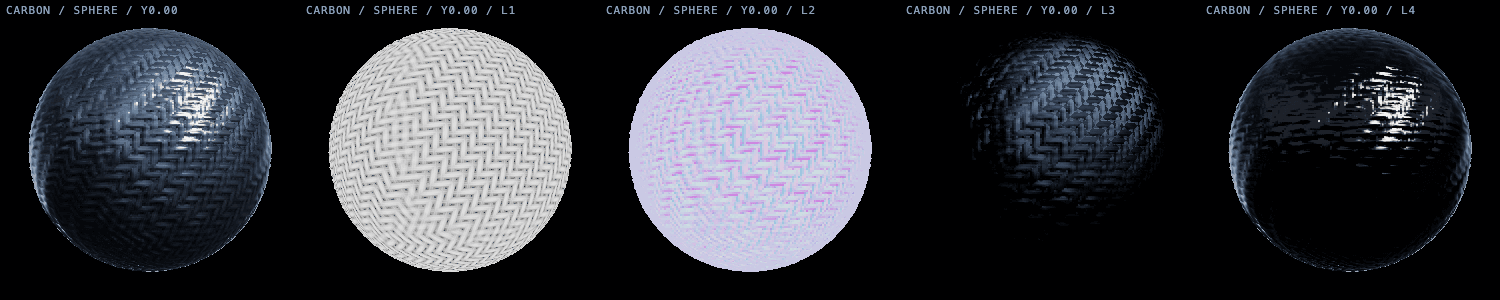
Every material started out bump-mapped.2 Bump mapping doesn't change the shape, only how light hits it: wherever the height pattern slopes, the surface is lit as if it were tilted that way, so a flat face looks dented. The height pattern is computed from the same noise and cellular patterns above, not stored as an image. The code below finds that slope (the gradient of the height pattern) at every pixel.3
vec3 bumped(vec3 N, vec3 position, float height, float amplitude) { // Ease off as displacement takes over the large shapes amplitude *= 1.0 - 0.40 * uDisplace; vec3 dpdx = dFdx(position); vec3 dpdy = dFdy(position); float dhdx = dFdx(height); float dhdy = dFdy(height); vec3 r1 = cross(dpdy, N); vec3 r2 = cross(N, dpdx); float det = dot(dpdx, r1); if (abs(det) < 1e-12) return N; vec3 gradient = sign(det) * (dhdx * r1 + dhdy * r2); return normalize(abs(det) * N - amplitude * gradient);}Pick a material above and the toggle row in its panel shows these layers separately: the height pattern, the tilted surface it produces, and the light layers stacked on top.
However, bump maps have a shortcoming: since the shape never changes, the silhouette stays smooth. No matter how deeply pitted a cube looked, its edges stayed perfectly straight, so I opted for displacement: the same height pattern now moves the mesh's vertices in and out. That bought three things bumps can't:
- A bumpy silhouette: the dents, cracks and weave now show along the edges of the shape instead of stopping short of them.
- Real depth: raised parts hide the dips behind them as the shape turns, instead of looking painted on.
- Texture that still looks raised near the edges, where the surface turns away from you and bump mapping stops being convincing.
Displacement didn't replace bump mapping. A mesh can only move at its vertices, so detail finer than the spacing between them, like the weave's filaments and the gold's orange-peel texture, is still bump-mapped. As displacement increases, the bump mapping eases off, so the large shapes aren't applied twice. Each material has a slider that blends between the two, from bump mapping only to fully displaced: dent depth on the gold, fissure depth on the lava.
Displacing a mesh without splitting its seams meant pushing both sides of a seam the same way.
Implementing displacement tore every shape open along its seams. A mesh stores a point more than once wherever separate parts of its surface meet, and each copy carries its own outward direction. Pushed along different directions, the copies pulled apart and left gaps. The fix averages the directions of every copy that shares a position, so all of them move the same way and the seams stay sealed. The shared direction also feeds the height pattern, since the carbon weave's height depends on which way the surface faces.
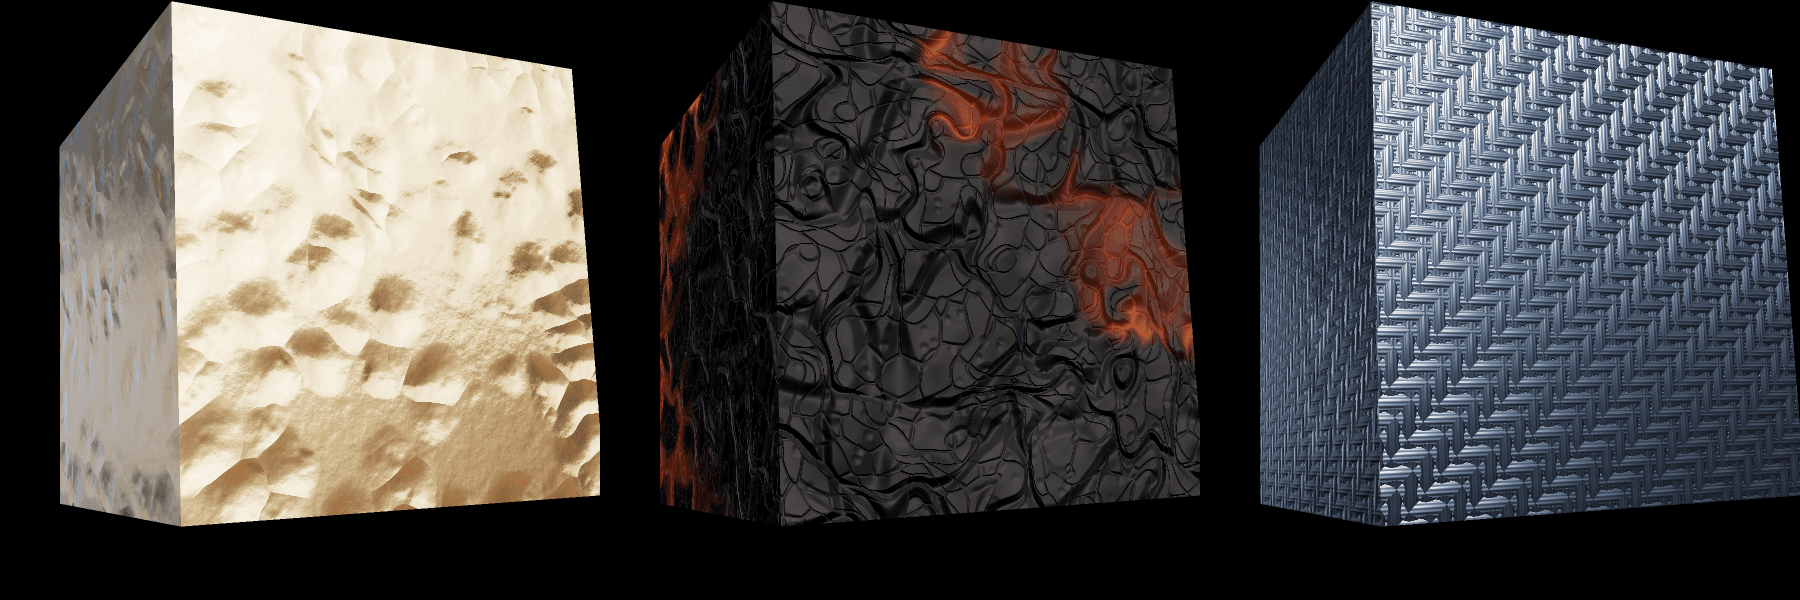
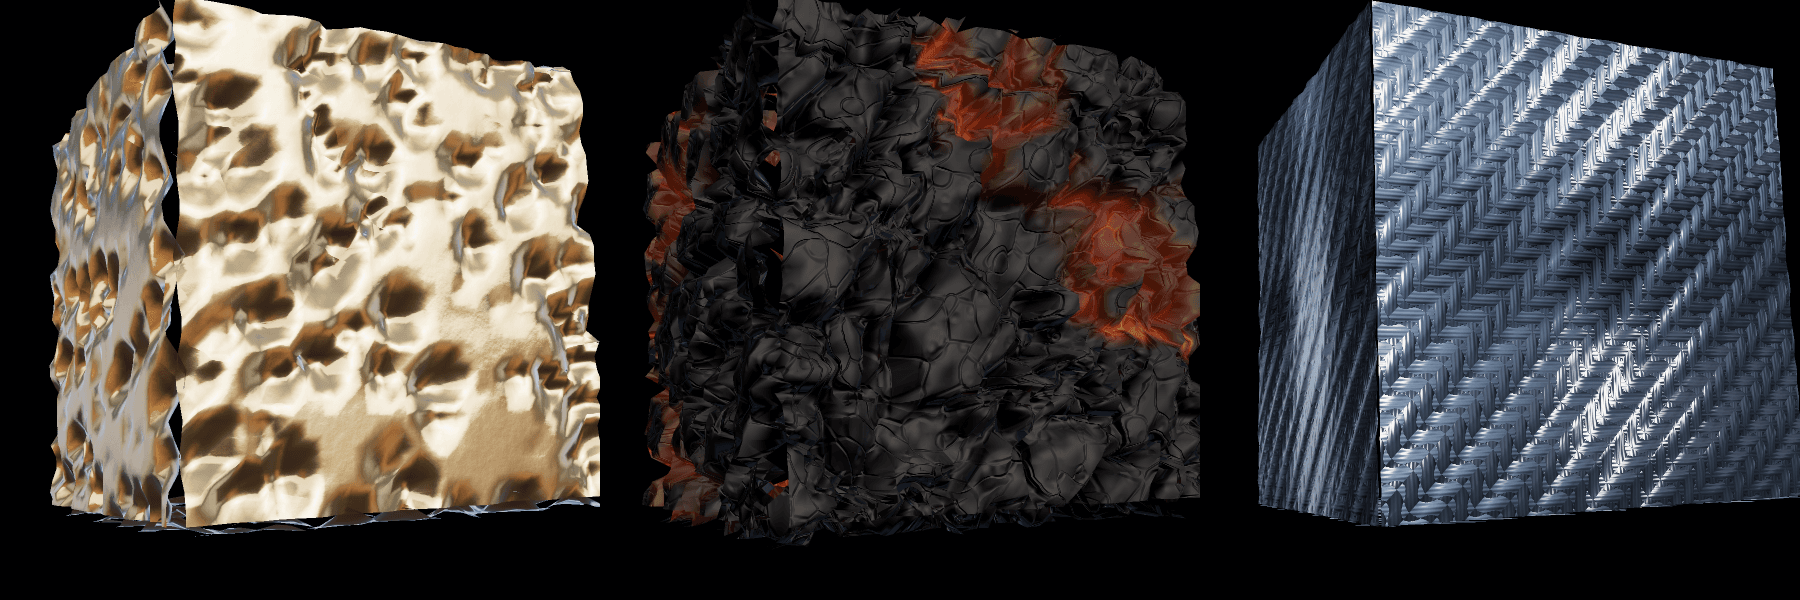
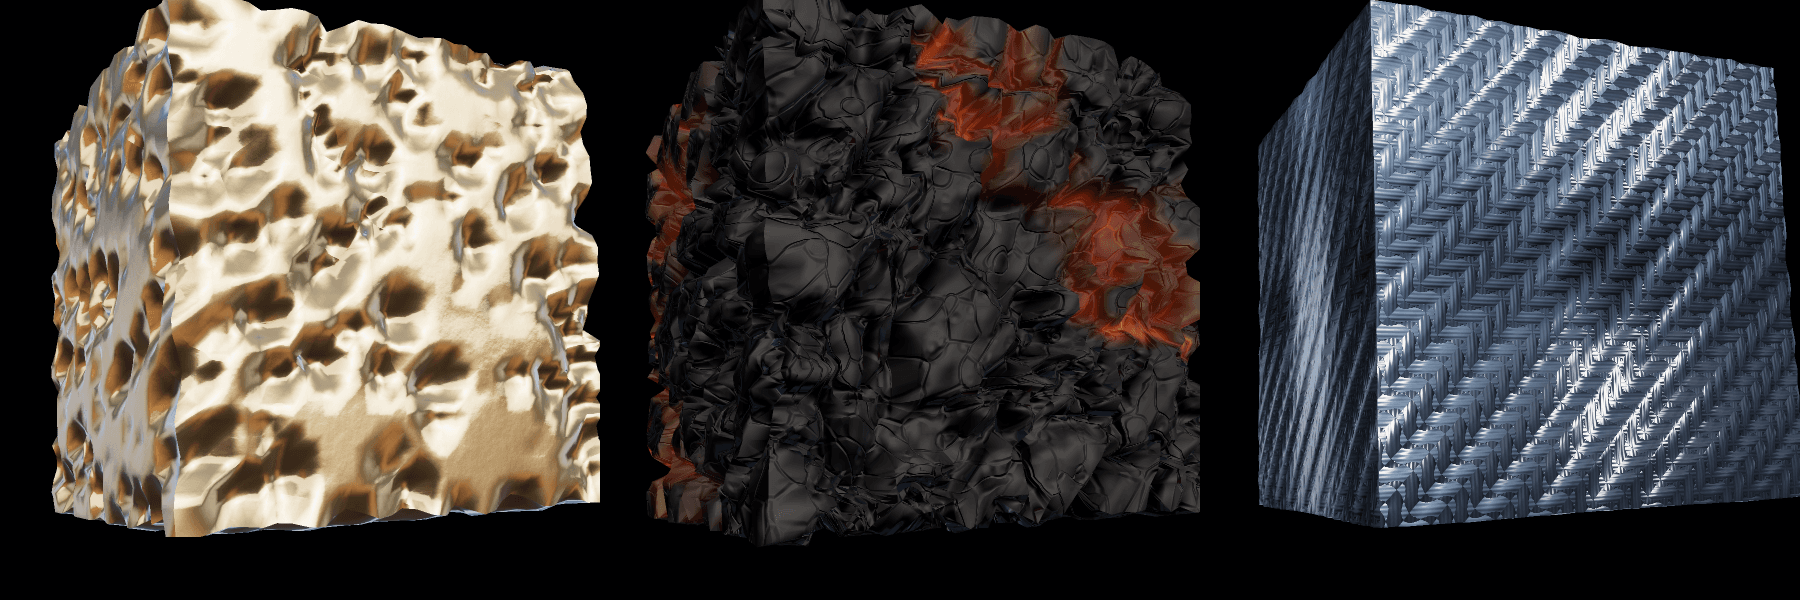
All six materials ship as 17 KB of shader code, with no image data at all.
A texture-based material typically uses four maps: color, normal, roughness and height. At 2048 × 2048 pixels and 4 bytes per pixel, each map takes 16 MB of GPU memory uncompressed, or about 21 MB with the smaller copies (mipmaps) the GPU keeps for distant surfaces. That's about 85 MB per material. These materials use none, trading that memory for computation: the GPU works out each surface as it's drawn. On the web, where every image has to download before it can appear, that's usually the better side of the trade.
Compared with materials built from scanned textures, the procedural ones:
- Weigh almost nothing. All six materials, and the hero's marble, come from one shader file: 17 KB gzipped, comments included. There are no images to download, decode or keep in memory.
- Never run out of resolution. Every pixel is computed as it's drawn, so a close-up stays sharp instead of blurring at the size of the texture.
- Fit any shape. With no texture to wrap around the mesh, there's no unwrapping and no seam where the edges of a texture meet. The same material covers a sphere, a torus knot or a statue scan.
- Change in real time. Every property is a number, so dent depth or vein density is a slider, not a new scan.
Mathematics alone was enough to build six convincing materials, and it made them lighter, sharper and easier to change than the textures they stand in for.
Notes & references
- Worley, S. (1996). A cellular texture basis function. SIGGRAPH '96. ↩
- Blinn, J. F. (1978). Simulation of wrinkled surfaces. SIGGRAPH '78. ↩
- Mikkelsen, M. S. (2010). Bump mapping unparametrized surfaces on the GPU. Journal of Graphics, GPU, and Game Tools, 15(1), 49–61. The bump-mapping code above follows this method. ↩
- Model. The Winged Victory of Samothrace at the top of the page is awesome3dgeek's free model on CGTrader, under its Royalty Free licence.